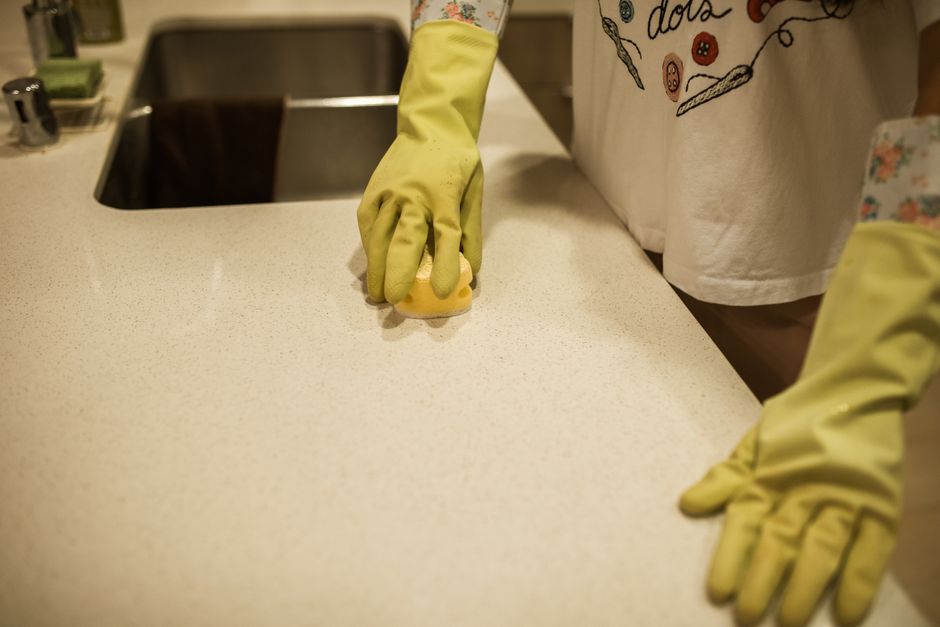
Insider tips to speed clean kitchen surfaces before inspection
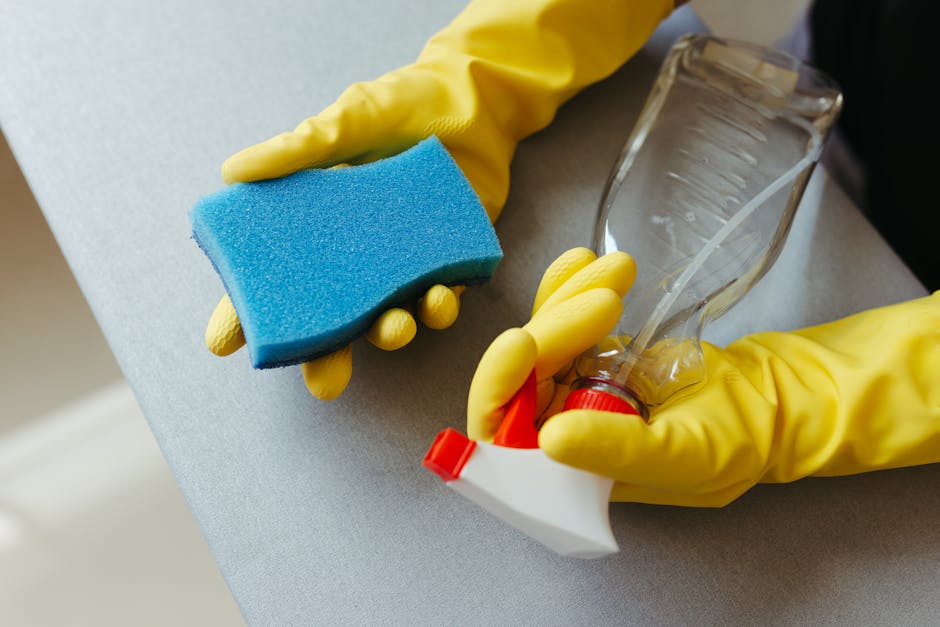
If you have an inspection coming up, the kitchen can suddenly feel like the most unforgiving room in the house. One smear on the worktop, a sticky patch near the hob, or a dull sink edge can make the whole place look less cared for than it really is. The good news? With the right routine, you can speed clean kitchen surfaces before inspection without doing a full-day deep clean. These insider tips are about working smarter: clearing clutter fast, targeting the surfaces people actually notice, and getting a clean, fresh finish that looks inspection-ready. Simple, practical, and doable even when you are short on time.
What follows is the kind of approach that saves stress on moving day, before a landlord visit, or when you simply need the kitchen to look sharp in a hurry. It is not about perfection for the sake of it. It is about the visible details. And yes, that is where the trick lies.
Why Insider tips to speed clean kitchen surfaces before inspection Matters
Kitchen surfaces are one of the fastest ways an inspector, landlord, agent, or homeowner can judge the rest of the space. That sounds a bit harsh, but it is true. People notice shine, residue, streaks, crumbs, and smells almost instantly. A kitchen can be technically clean and still fail the "looks clean" test if the counters are cloudy or there is grease around handles and splash zones.
Speed cleaning matters because inspections are usually time-bound. You may only have a few hours, or sometimes just the last evening before someone arrives. In that window, you need a method that removes the most visible grime first. Not every task is equally valuable. Cleaning behind the toaster matters less than wiping the strip of worktop in front of the sink, for example. A good inspection clean is all about visible impact.
It also matters because kitchen surfaces tend to hide layered dirt. Cooking vapour leaves a thin film that slowly catches dust. Splashback areas collect grease. Around taps, you get hard-water marks. If you ignore those layers, the room starts to look tired. To be fair, most kitchens do. It happens quietly, then suddenly you notice it under daylight and think, oh, that is not ideal.
If your inspection is tied to the end of a tenancy, the standards can feel especially strict. In that case, it can help to understand the broader expectations of end of tenancy cleaning and how a focused kitchen clean supports the overall result. When the kitchen is handled well, the rest of the property usually feels easier too.
How Insider tips to speed clean kitchen surfaces before inspection Works
The basic idea is simple: work from high-visibility surfaces down to lower-visibility details, and use products and cloths that break through grime quickly instead of spreading it around. Speed cleaning is not about skipping steps. It is about sequencing the right steps so you do not waste time re-cleaning the same area.
Think of it in three layers. First, remove clutter so surfaces are fully exposed. Second, cut through grease and residue with a suitable cleaner. Third, buff for a dry, streak-free finish. That last step is what makes the kitchen look "done." A slightly damp worktop can look clean for ten seconds and then start showing streaks. Annoying, yes. Very normal, also yes.
For the quickest results, focus on the surfaces most likely to be checked or photographed: counters, sink surrounds, hob, splashback, cupboard fronts near the cooking zone, and the edge of appliances. If you have time, expand to the fridge door, microwave exterior, and any shelves or ledges visible from the entrance. These are the places that frame the room.
It helps to know the difference between surface soil and ingrained soil. Surface soil wipes away quickly. Ingrained dirt, like baked-on grease or old limescale, may need a short dwell time with cleaner or a second pass. That is why a fast kitchen clean still needs judgement. Spray, wait a moment, wipe, inspect. Spray again only where needed.
Key Benefits and Practical Advantages
The obvious benefit is time saved. But the real benefit is confidence. When you know the kitchen surfaces are sorted, you stop second-guessing every little mark. That mental breathing space matters more than people admit. Inspection days can be tense, and the kitchen often carries most of the pressure.
Another advantage is cost control. If you can get the visible areas clean yourself, you may not need a more extensive service for every room. For some homes, a targeted one-off clean is enough. For others, you may decide the kitchen needs professional attention and then book only what is necessary. Either way, a focused method helps you make a sensible choice.
There is also a practical hygiene benefit. Even a quick inspection clean removes the sticky residue that attracts dust and makes the room feel less fresh. A clean sink, clean counters, and grease-free touchpoints create a much better first impression. People do notice that, even if they do not say it out loud.
And if you are comparing cleaning support options, it may help to look at deep cleaning when the kitchen has not been maintained recently, or one-off cleaning when you need a single, intensive visit rather than a regular service.
- Saves time on inspection day
- Improves visible cleanliness quickly
- Helps reduce stress and last-minute panic
- Makes it easier to judge whether professional help is needed
- Creates a fresher, more maintained look without overworking the whole room
Who This Is For and When It Makes Sense
This approach is useful for tenants, landlords, homeowners, letting agents, housemates, and anyone expecting a property check. It is especially relevant if you are leaving a rented property and want the kitchen to look presentable for a checkout inspection. It also works well before a sale viewing, a family visit, or even after a big cooking weekend when the room has gone from tidy to slightly chaotic. Happens to the best of us.
It makes sense when the kitchen is mostly clean but needs a smart reset. If you can already see the counters, sink, and hob, but they just look dull, this is your sweet spot. If the kitchen has heavy grease, mould, or years of build-up, you are likely beyond a quick clean and into deeper restoration territory. In that case, a more thorough service such as oven cleaning or broader deep cleaning can be a better investment of time.
It is also worth saying that not every inspection is the same. A property manager may focus on obvious cleanliness and damage, while a new buyer's viewing is more about first impressions. The method stays similar, but your priorities may shift. If in doubt, clean the surfaces that frame the space, then move outward.
Step-by-Step Guidance
Here is the quickest sensible sequence for speed cleaning kitchen surfaces before an inspection. Keep it calm. Keep it moving. No need to get theatrical with the sponge.
- Clear everything off the surfaces. Put appliances, chopping boards, jars, and mail into one basket or box. The less visual clutter, the faster the kitchen looks clean.
- Dry dust first. Wipe crumbs and loose debris away before using any spray. This prevents streaking and stops you from pushing grit around.
- Start with the sink area. Spray the sink, taps, and surrounding worktop. These are high-visibility zones and often the dirtiest-looking areas in the room.
- Work from left to right, or top to bottom. Choose one direction and stick to it so you do not miss patches. Speed suffers when your eyes keep jumping around.
- Target grease-prone spots. Focus on the hob, extractor edge, splashback, kettle area, and handles near cooking surfaces.
- Let the cleaner dwell briefly. A short pause helps lift grease. Do not let it dry completely, though. That is how streaks happen.
- Wipe with a clean microfibre cloth. Use one cloth for cleaner residue and a dry one for the finishing buff if needed.
- Buff for shine. A dry wipe at the end makes laminate, stainless steel, and sealed stone surfaces look much sharper.
- Check under bright light. Stand at an angle, or near a window if you have daylight. You will spot streaks you could not see head-on.
- Reset the room. Put back only the essentials. Too many items on the counter can undo the whole effect.
If you are dealing with an oven edge or door as part of the same job, it may be worth separating that task instead of letting it eat the whole timetable. A dedicated oven cleaner product or service is often better for baked-on residue than a general all-purpose spray. That is one of those small decisions that saves a lot of rubbing.
Fast routine for different surface types
Laminate worktops: Use a mild spray, wipe, then dry buff. Avoid soaking joins.
Quartz or stone-look surfaces: Use a cleaner suited to the manufacturer guidance if you have it. If not, keep to gentle products and a soft cloth.
Stainless steel: Wipe with the grain where possible. Fingerprints can disappear fast with the right cloth.
Glass or mirrored splashbacks: Use a light spray and a lint-free cloth. Less is more.
Expert Tips for Better Results
The fastest kitchen cleans are usually the ones that avoid unnecessary friction. Here are the tips that make a real difference when time is tight.
Use two cloths, not one. One cloth removes the grime. The other finishes the surface. This stops the residue from being smeared back onto the area you have just cleaned.
Keep one small rubbish bag nearby. Empty tea bags, food packaging, and random bits immediately. If clutter lingers, the room still reads as messy even when the counters are wiped.
Warm water helps with grease. Not boiling water, just warm enough to improve cleaning speed. It can make a surprising difference on sticky patches.
Work around the natural light. If the kitchen has daylight, use it. Morning light or late-afternoon light will show streaks better than overhead bulbs. Handy, if slightly unforgiving.
Use a toothbrush or small detail brush for edges. Around taps, sink rims, and hob knobs, a tiny brush is quicker than wrestling with a cloth corner.
Do not over-wet surfaces. Inspection cleans are often ruined by lingering moisture, especially on edges and joins. A dry finish is what sells the result.
Finish with scent, but lightly. A fresh kitchen should smell clean, not like a perfumery exploded in it. A neutral clean smell is best. Honestly, strong fragrance can make people suspicious.
If your kitchen includes floors that show every crumb, a quick pass with hard floor cleaning can help the whole room feel finished. Surfaces and floor work together visually; one clean bit without the other can look oddly half-done.
Expert summary: If you only have a short window before inspection, do not chase perfection in hidden corners first. Focus on the surfaces that catch light, frame the room, and collect grease. That is where the result is won.
Common Mistakes to Avoid
Most rushed kitchen cleans go wrong in predictable ways. The funny thing is, they are all avoidable if you slow down just enough to be strategic.
Cleaning before clearing. If the surface is still covered in items, you waste time wiping around objects and missing edges.
Using too much product. More spray does not mean more clean. It usually means more residue and more wiping.
Ignoring handles and switches. People touch these constantly. If they are greasy, the whole kitchen feels neglected even if the counters are decent.
Forgetting the splashback. This is one of the most visible zones in the room, and it often has a thin film of cooking residue.
Not drying the surface. Water marks can look like dirt. Especially on dark counters and steel.
Trying to do everything. It is tempting to clean drawers, organise cupboards, and wipe the skirting boards. That is how the inspection surface clean becomes a time sink. Be selective.
Using the wrong cloth. A fluffy or dirty cloth leaves lint and pushes grease around. Not ideal when you are trying to look calm and competent.
Missing the inside edge of the sink. That ring around the basin is tiny, but it catches the eye. Weirdly enough, it matters a lot.
Tools, Resources and Recommendations
You do not need a mountain of equipment to speed clean kitchen surfaces before inspection. In fact, too many bottles on the counter just create more clutter. Keep it lean.
| Tool or product | Best use | Why it helps |
|---|---|---|
| Microfibre cloths | Wiping and buffing surfaces | Lift dust and grease without leaving lint |
| All-purpose kitchen cleaner | General worktops and splash zones | Quick to apply and effective on everyday residue |
| Warm water bowl | Lifting light grease | Improves wipe-off speed on sticky areas |
| Small detail brush | Sink edges and tap bases | Helps clean tight spots fast |
| Dry towel | Final finish | Removes water marks and leaves a better visual result |
| Basket or box | Clutter removal | Lets you clear surfaces in one pass |
If you are comparing cleaning support, it may be worth reviewing professional cleaning company options when the job is bigger than a quick reset, or cleaners if you simply need experienced help to save time before the inspection. There is no prize for doing it all the hard way.
For households that prefer a broader home reset rather than a single-room fix, domestic cleaning and house cleaning pages can be useful starting points. If the kitchen is part of a larger post-renovation tidy-up, after builders cleaning may be the better fit.
Law, Compliance, Standards, or Best Practice
For most readers, there is no special legal rule about how quickly kitchen surfaces must be cleaned before an inspection. The important point is best practice and the condition expected by the person inspecting the property. In rental settings, that usually means a reasonable standard of cleanliness, with no visible grease, food residue, or avoidable mess on visible surfaces.
If you are in a rented home in the UK, it is sensible to check your tenancy agreement and any inventory or check-out guidance. Those documents often matter more than general assumptions. Some landlords or agents are strict about cooker surrounds, sinks, and visible splashback staining, while others focus more on condition than pristine presentation. So, read the room, as they say.
From a practical safety perspective, kitchen cleaners should be used according to the product label. That sounds obvious, but people often rush this bit and end up with fumes, streaks, or damaged finishes. Keep windows open if you are using stronger cleaners, avoid mixing products, and test any unfamiliar solution on a small hidden area first. A little caution goes a long way.
If you have concerns about the service standard or what is included in a professional clean, it is wise to review terms and conditions carefully and understand the provider's insurance and safety approach. That is just sensible housekeeping, really.
Options, Methods, or Comparison Table
Different cleaning approaches suit different time limits. This quick comparison can help you decide what makes sense today rather than what sounds ideal on paper.
| Method | Best for | Pros | Limitations |
|---|---|---|---|
| Speed clean | Visible refresh before inspection | Fast, targeted, inexpensive | Not suitable for heavy build-up |
| Deep clean | Built-up grime or neglected kitchens | More thorough and longer-lasting | Needs more time and effort |
| Professional one-off visit | Busy moves, tight deadlines | Efficient, less stress, more consistent finish | Costs more than DIY |
| Specialist oven or appliance clean | Baked-on grease and stubborn stains | Handles the worst areas properly | May not cover the whole room |
In most inspection situations, the best choice is a hybrid: speed clean the surfaces yourself, then decide whether the worst problem spots need extra attention. That can be the oven, the sink limescale, or the floor. If the kitchen has a lot of hard-to-shift residue, a dedicated cleaner may save you time and, honestly, a bit of your sanity.
Case Study or Real-World Example
A typical example: a small two-bedroom flat, inspection booked for the next morning, and the kitchen has the usual signs of daily life. Nothing dramatic. A few crumbs near the toaster, fingerprint marks on cupboard doors, a greasy patch around the hob, and a sink with dried water spots. The tenant has about 45 minutes after work. Not ideal, but workable.
The fastest result came from a simple sequence. First, everything came off the worktops and into a single basket. Then the sink, taps, and hob got sprayed and left for a short dwell time while the cupboard fronts were wiped. After that, the cleaner came back to the hob and splashback, followed by a dry buff on the counters and steel handles. The last step was the one that changed the whole feel. Suddenly the room looked brighter, newer, more cared for.
There was still a tiny chip on the side of a cupboard and one scuff on the kickboard. Those did not matter. The surface shine carried the impression. That is the secret, really. Not every flaw disappears. But many of them stop standing out.
By the end, the kitchen looked inspection-ready without turning into a full deep clean. The tenant could breathe again, which is half the battle on a busy evening. Small win, big relief.
Practical Checklist
Use this quick checklist just before the inspection or as a final pass the night before.
- All visible clutter removed from counters
- Worktops wiped and dried
- Sink, taps, and drain area cleaned
- Hob surface free from grease and crumbs
- Splashback wiped and streak-free
- Cupboard fronts near cooking areas cleaned
- Appliance exteriors wiped, especially handles
- Any sticky spots around bins or binside areas removed
- Floor around the kitchen surfaces swept or vacuumed
- Fresh cloth used for the final buff
- Windows or ventilation used if stronger products were applied
- Final glance taken under natural light or bright overhead light
If you are short on time, do the first six items first. That alone will make a strong visual difference. Then work outward only if you can. The point is progress, not a perfect museum kitchen.
Conclusion
Speed cleaning kitchen surfaces before inspection is really about making smart choices under pressure. Clear the clutter. Focus on the high-impact surfaces. Use the right cloths, the right sequence, and a finish that looks dry and crisp. Do that well, and the room will feel much better than the clock suggests it should.
And if the job is bigger than you thought, that is fine too. Sometimes the best decision is not to keep scrubbing at a stubborn patch, but to step back and treat the room more strategically. The kitchen will tell you when it needs a deeper approach. You just need to listen.
Get a free quote today and see how much you can save.
For readers who want a fuller overview of service standards and helpful pages, you can also review about us and contact us if you need to speak with a team about the best next step. A tidy kitchen is nice. A calm inspection is better.
Frequently Asked Questions
How do I speed clean kitchen surfaces before inspection without missing spots?
Use a fixed order: clear clutter, dust crumbs, clean sink and tap areas, wipe the hob and splashback, then dry buff the worktops. Working in the same direction each time reduces missed patches and saves a surprising amount of time.
What is the fastest thing to clean first in a kitchen before inspection?
The sink area and the main worktops usually give the quickest visual improvement. They catch the eye immediately, especially if they are shiny and free of streaks. After that, the hob and splashback are the next best targets.
Can I use one cleaner for all kitchen surfaces?
Sometimes, yes, if it is a general kitchen-safe product and the surface manufacturer allows it. But some finishes, especially stone or specialist coatings, need gentler treatment. If you are unsure, use a mild cleaner and test a hidden area first.
How long should a quick inspection clean take?
For a reasonably tidy kitchen, a focused surface clean can take 20 to 45 minutes. If the room has heavy grease or clutter, it will take longer. The aim is not to clean every hidden corner; it is to make the visible surfaces look fresh and maintained.
Do I need to clean inside cupboards before an inspection?
Usually not unless the inspection instructions say so, or the cupboards are visibly dirty or damaged. Most inspections focus on the exterior condition, surface cleanliness, and any obvious smell or residue. Inside cupboards matter more during move-out checks or deep cleans.
What should I do about greasy cupboard doors?
Use a degreasing cleaner lightly, then wipe with a clean damp cloth and finish dry. The key is not to soak the doors. Around handles and lower edges, use a cloth corner or small brush to reach the sticky bits.
Is it worth booking professional help just for the kitchen?
If the kitchen is the main problem area or you are very short on time, yes, it can be worth it. A targeted service may save you stress and help you avoid redoing the same jobs repeatedly. It is especially useful when the oven, splashback, or hard floors need more attention than you can give.
What surfaces do inspectors usually notice first?
Worktops, sink surrounds, hob areas, splashbacks, cupboard fronts near cooking zones, and appliance exteriors. These areas show how the room has been looked after. A clean finish there usually carries the rest of the room along with it.
How do I avoid streaks on kitchen surfaces?
Use less product, use two cloths if possible, and dry the surface at the end. Streaks often come from over-spraying or leaving cleaner to air-dry on its own. Natural light will reveal the problem quickly, so check near a window if you can.
What if my kitchen has limescale as well as grease?
Treat them separately. Grease needs a degreasing cleaner, while limescale usually needs a product made for mineral deposits. If you mix approaches or rush the process, you can end up chasing one problem and making another look worse. Not ideal.
Should I clean the oven as part of a surface speed clean?
Only if the oven is visible and clearly affects the kitchen's overall impression. A quick wipe of the exterior can help, but heavy internal oven cleaning is a separate task. If the oven is the issue, consider a dedicated oven clean rather than trying to force it into a surface routine.
What is the best last-minute checklist before someone walks in?
Empty clutter from counters, wipe the sink and hob, dry all worktops, clean handles, remove visible crumbs, and check the room under bright light. Those five minutes at the end can make the entire kitchen look sharper. Sometimes that final pass is the difference between "fine" and "done."
When should I stop speed cleaning and book a deeper service?
If the grime is baked on, the room still smells stale after cleaning, or the surfaces remain sticky after two passes, you are probably beyond the quick-clean stage. At that point, a deeper or specialist clean may be more sensible than spending another hour chasing the same marks.